


To get started, you'll need to have planNT1 enabled on your account. To request access, contact our Sales Team .
Provisioning planNT1
Provisioning planNT1 to your IoT SIM will disable automatic switching between subscriptions, including cellular subscriptions. You will need to use AT commands to switch subscriptions manually.
For example, if you provision planNT1 to a plan-US IoT SIM that also has the plan-US-max subscription container, the IoT SIM will no longer automatically switch between plan-US and plan-US-max based on coverage.
-
Add planNT1 to your plan01s or plan-US IoT SIM card by following the Adding a Subscription instructions in the Subscription Containers documentation.
-
Confirm that the delivery status of the planNT1 subscription is
ready.
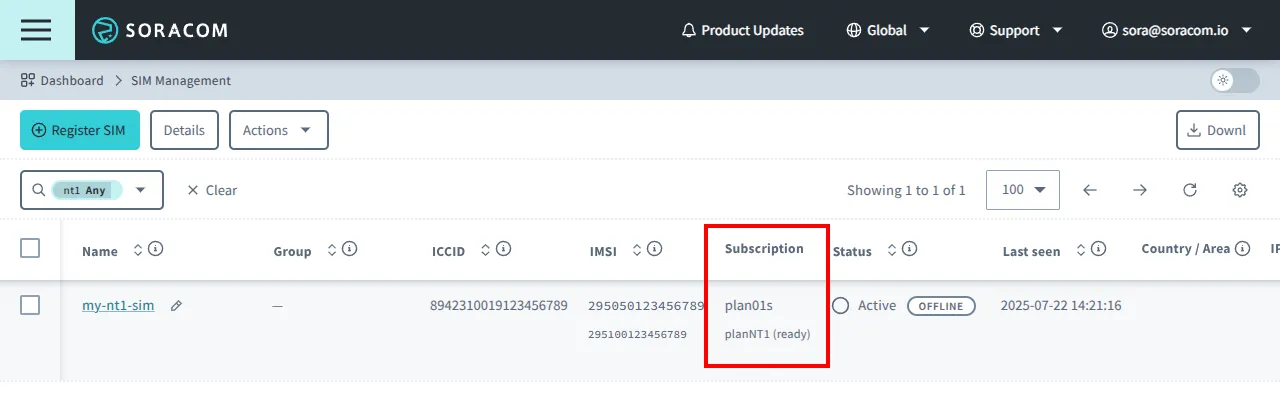
Switching the Active Subscription
Provisioning an IoT SIM with planNT1 disables automatic switching between subscriptions, including cellular subscriptions. To switch the active subscription after delivery, use AT commands.
To run AT+CSIM commands, your modem must be enabled. You can use the AT+CFUN=1 command to enable the modem manually.
Switching to planNT1
Unlike other subscriptions, planNT1 is provisioned as disabled by default using the "enable":false parameter. This precaution is intentional to prevent accidental usage, as satellite communication incurs significantly higher costs compared to cellular.
To use planNT1, the subscription must be manually selected by connecting to your device's serial interface and running the following AT command:
AT+CSIM=52,"80C2000015D613190103820282811B0100130799F08900010001"After selecting the subscription, verify that the active IMSI has switched correctly:
AT+CIMIThe IMSI displayed should be the same planNT1 IMSI beginning with 29510 that is displayed on your SIM Management page.
Switching to Other Subscriptions
To return to using other Soracom subscriptions, activate the subscription by using the appropriate AT command for that subscription:
| Subscription | Subscription Activation AT Command |
|---|---|
| plan01s | AT+CSIM=52,"80C2000015D613190103820282811B0100130799F05000010001" |
| plan-US | AT+CSIM=52,"80C2000015D613190103820282811B0100130799808500010001" |
| planX1 | AT+CSIM=52,"80C2000015D613190103820282811B0100130799F00100010001" |
| planX2 | AT+CSIM=52,"80C2000015D613190103820282811B0100130799000200010001" |
| planX3 | AT+CSIM=52,"80C2000015D613190103820282811B0100130799F01300010001" |
| planP1 or plan-US-NA | AT+CSIM=52,"80C2000015D613190103820282811B0100130799F02100010001" |
| plan-US-max | AT+CSIM=52,"80C2000015D613190103820282811B0100130799302100010001" |
Module Configuration
For detailed configuration instructions, see specific setup guides depending on your module:
- Murata 1SC / Quectel BG770A-SN setup
- While this page only directly mentions the 1SC, both modules are based on the Altair1250 chipset and therefore support the same AT commands, making their setup and configuration identical.
All modules follow similar configuration patterns:
- Set APN to
soracom.io - Enable NB-IoT (NTN)
- Set the correct frequency band for your region: band 256 for Europe, band 255 for the UK, Oceania, and Brazil, or band 23 for the US and Canada.
- Set the GPS or GNSS location
- Enable the modem using
AT+CFUN=1
planNT1 supports both eDRX and PSM modes.
Sending and Receiving Data
Once connected, you can test your connection by:
- Sending a ping to Soracom's ping endpoint.
- Adding your planNT1-provisioned IoT SIM to a group configured to use Unified Endpoint and Soracom Harvest Data, and sending data to the Unified Endpoint. Unified Endpoint will return response codes validating reception.